


DIY Drywall Repair Part 1
 Summer is typically the time of year that the family takes on a lot of little home projects that have been accumulating through the year. And, chances are, one of these projects is a sneaky little drywall repair that has been bugging you since you first noticed the hole, gouge, dent or whatever. It doesn’t matter how beautiful the rest of your home is – a cracked, chipped or otherwise damaged drywall can mar any home’s interior making it appear less than its best, in fact it can make it look even shoddy. As a result, repairing drywall damage will give any room in your home a cleaner, crisper look.
If you’re planning to attempt these repairs yourself, you should take care to make sure you have the right tools and technique on hand before attempting any repairs:
Tools
- Utility Knife
- Box Cutter
- Sandpaper (150-grit)
- Putty Knife
- pencil
Materials
- Joint Compound
- Spackle
- Drywall
- Tape – Fiberglass Mesh Drywall Tape and/or Paper Drywall Tape
Quick tips:
Be sure to check your blueprints to make sure there are no electrical wires running behind the area of the wall that is being cut. If there are, be careful not to cut too deep with the drywall knife.
After applying joint compound, use mesh tape versus drywall tape to cover the seams. It is harder to conceal a seam with tape. Plus, mesh creates a stronger bond between the old and existing drywall pieces.
Tips for smaller Repair Projects:
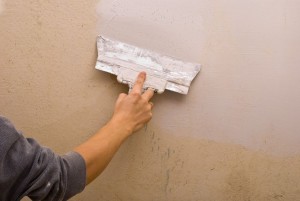
- Spackle only the small stuff—Spackle is a lightweight compound that is the “go-to” drywall repair substance, primarily due to its quick and easy application time and easy-to-sand surface. However, Spackle, and similar products, should only be used on very small holes, like nail holes, and shallow dents in your drywall. Spackle products are too weak to effectively repair drywall damage larger than about an inch in diameter.
- Tape correctly—For drywall repair, duct tape and masking tape are not viable options. You should either use paper or mesh drywall tapes, although each has its preferred uses for different kinds of projects.
- Paper Tape is best used for joint and corner repairs as it folds easily. Paper tape does not stick as well and can bubble and bulge if not applied correctly. This usually leads to future repairs.
- Fiberglass Mesh Tape is easier to use, but does not work well for corners, though it does work well for joints and hole repair. Mesh tape also requires more compound to cover its crisscross texture.
- Nail down Nail Pops—Feisty nails have a habit of breaking through drywall, especially in new homes. Repairing the damage requires more than just hammering the nails back in and painting over the holes. The nail must be driven back into the wall and a drywall screw inserted into the wall over and under the original nail pop. Then joint compound must be applied over the holes. During this process, other nail pops may occur. Nail pops that are not properly repaired in the first place may reappear later, adding another project for your To-Do list!
- If at all possible, use the original texturing tool—roller, brush, sponge, etc—as it will give you the best shot of matching the repaired area to the rest of the wall.
- Try to match the consistency of the joint compound to the surrounding surface texture. Thicken or thin the compound with water or extra powder and test the consistency on cardboard before applying it on the wall. If it doesn’t work, the compound can be scraped off fairly easily, and you can start over.
- Texture Tactfully—In order to repair drywall effectively, it requires more than just fixing holes and cracks. To complete the repair seamlessly, you must also retexture and/or paint the area over and around the repair. The retexturing of the repaired area so that it matches the surrounding surface can be tricky but the end result will be worth it. You will earn the best results with these two tips
- Resist Over-sanding—One of the most common mistakes of home repairers is trying too hard to smooth a drywall joint. By over-sanding the joint you can end up removing part of the paper face, leaving an uneven surface that ultimately needs another layer of joint compound and even more sanding! All of this can be avoided by using a hand sander and 150-grit sand paper. Using a coarser grain will lead to sanding marks and over-sanding. You can get into corners more easily by using a sanding sponge.
Part 2 covers Bigger Projects, so be sure to check back next week.